Oh, Indian food. One of the best tasting, most involved foods on the planet. My husband is from India and in all the years we’ve been married he has not complimented my cooking more than when I made this South Indian Chicken Biryani for him in my Instant Pot. That’s why I just have to share the recipe with you all today! I will cut to the chase and get straight to the recipe.

South Indian Chicken Biryani in the Instant Pot
Ingredients:
3 lbs chicken pieces with bones (legs and thighs work well)
2 cups fried onions
1 bunch of mint
1 bunch of cilantro
7 green chillies (serrano peppers)
1 lime, 1 cup plain yogurt
3 tablespoon chili powder
1.5 teaspoons turmeric powder
2 tablespoons cumin powder
1 tablespoon garam masala powder
2 tablespoons ginger-garlic paste
1 tablespoon salt (or to taste)
3 bay leaves
1 cinnamon stick
4 whole cloves
1 star anise
½ teaspoon shahi jeera (cumin seeds)
4 cardamom pods
5-10 whole peppercorns
2 tablespoons coconut oil (preferably cold-pressed and organic)
3 cups basmati rice
Tools: Instant Pot, large bowl or container with lid (for marinating)
1. Fry the Onions
Thinly slice onions and fry them in coconut oil on the stove. Once they are browned well, remove from the heat and let cool.
2. Marinade the Chicken
The first step for chicken biryani is to marinade the meat. Dice and add the mint and cilantro to a large bowl. Slit the green chillies and add to the bowl. Add the juice from the lime, the fried onions (now cooled), and all the remaining spices including the whole spices. Stir well into the yogurt creating a sauce.
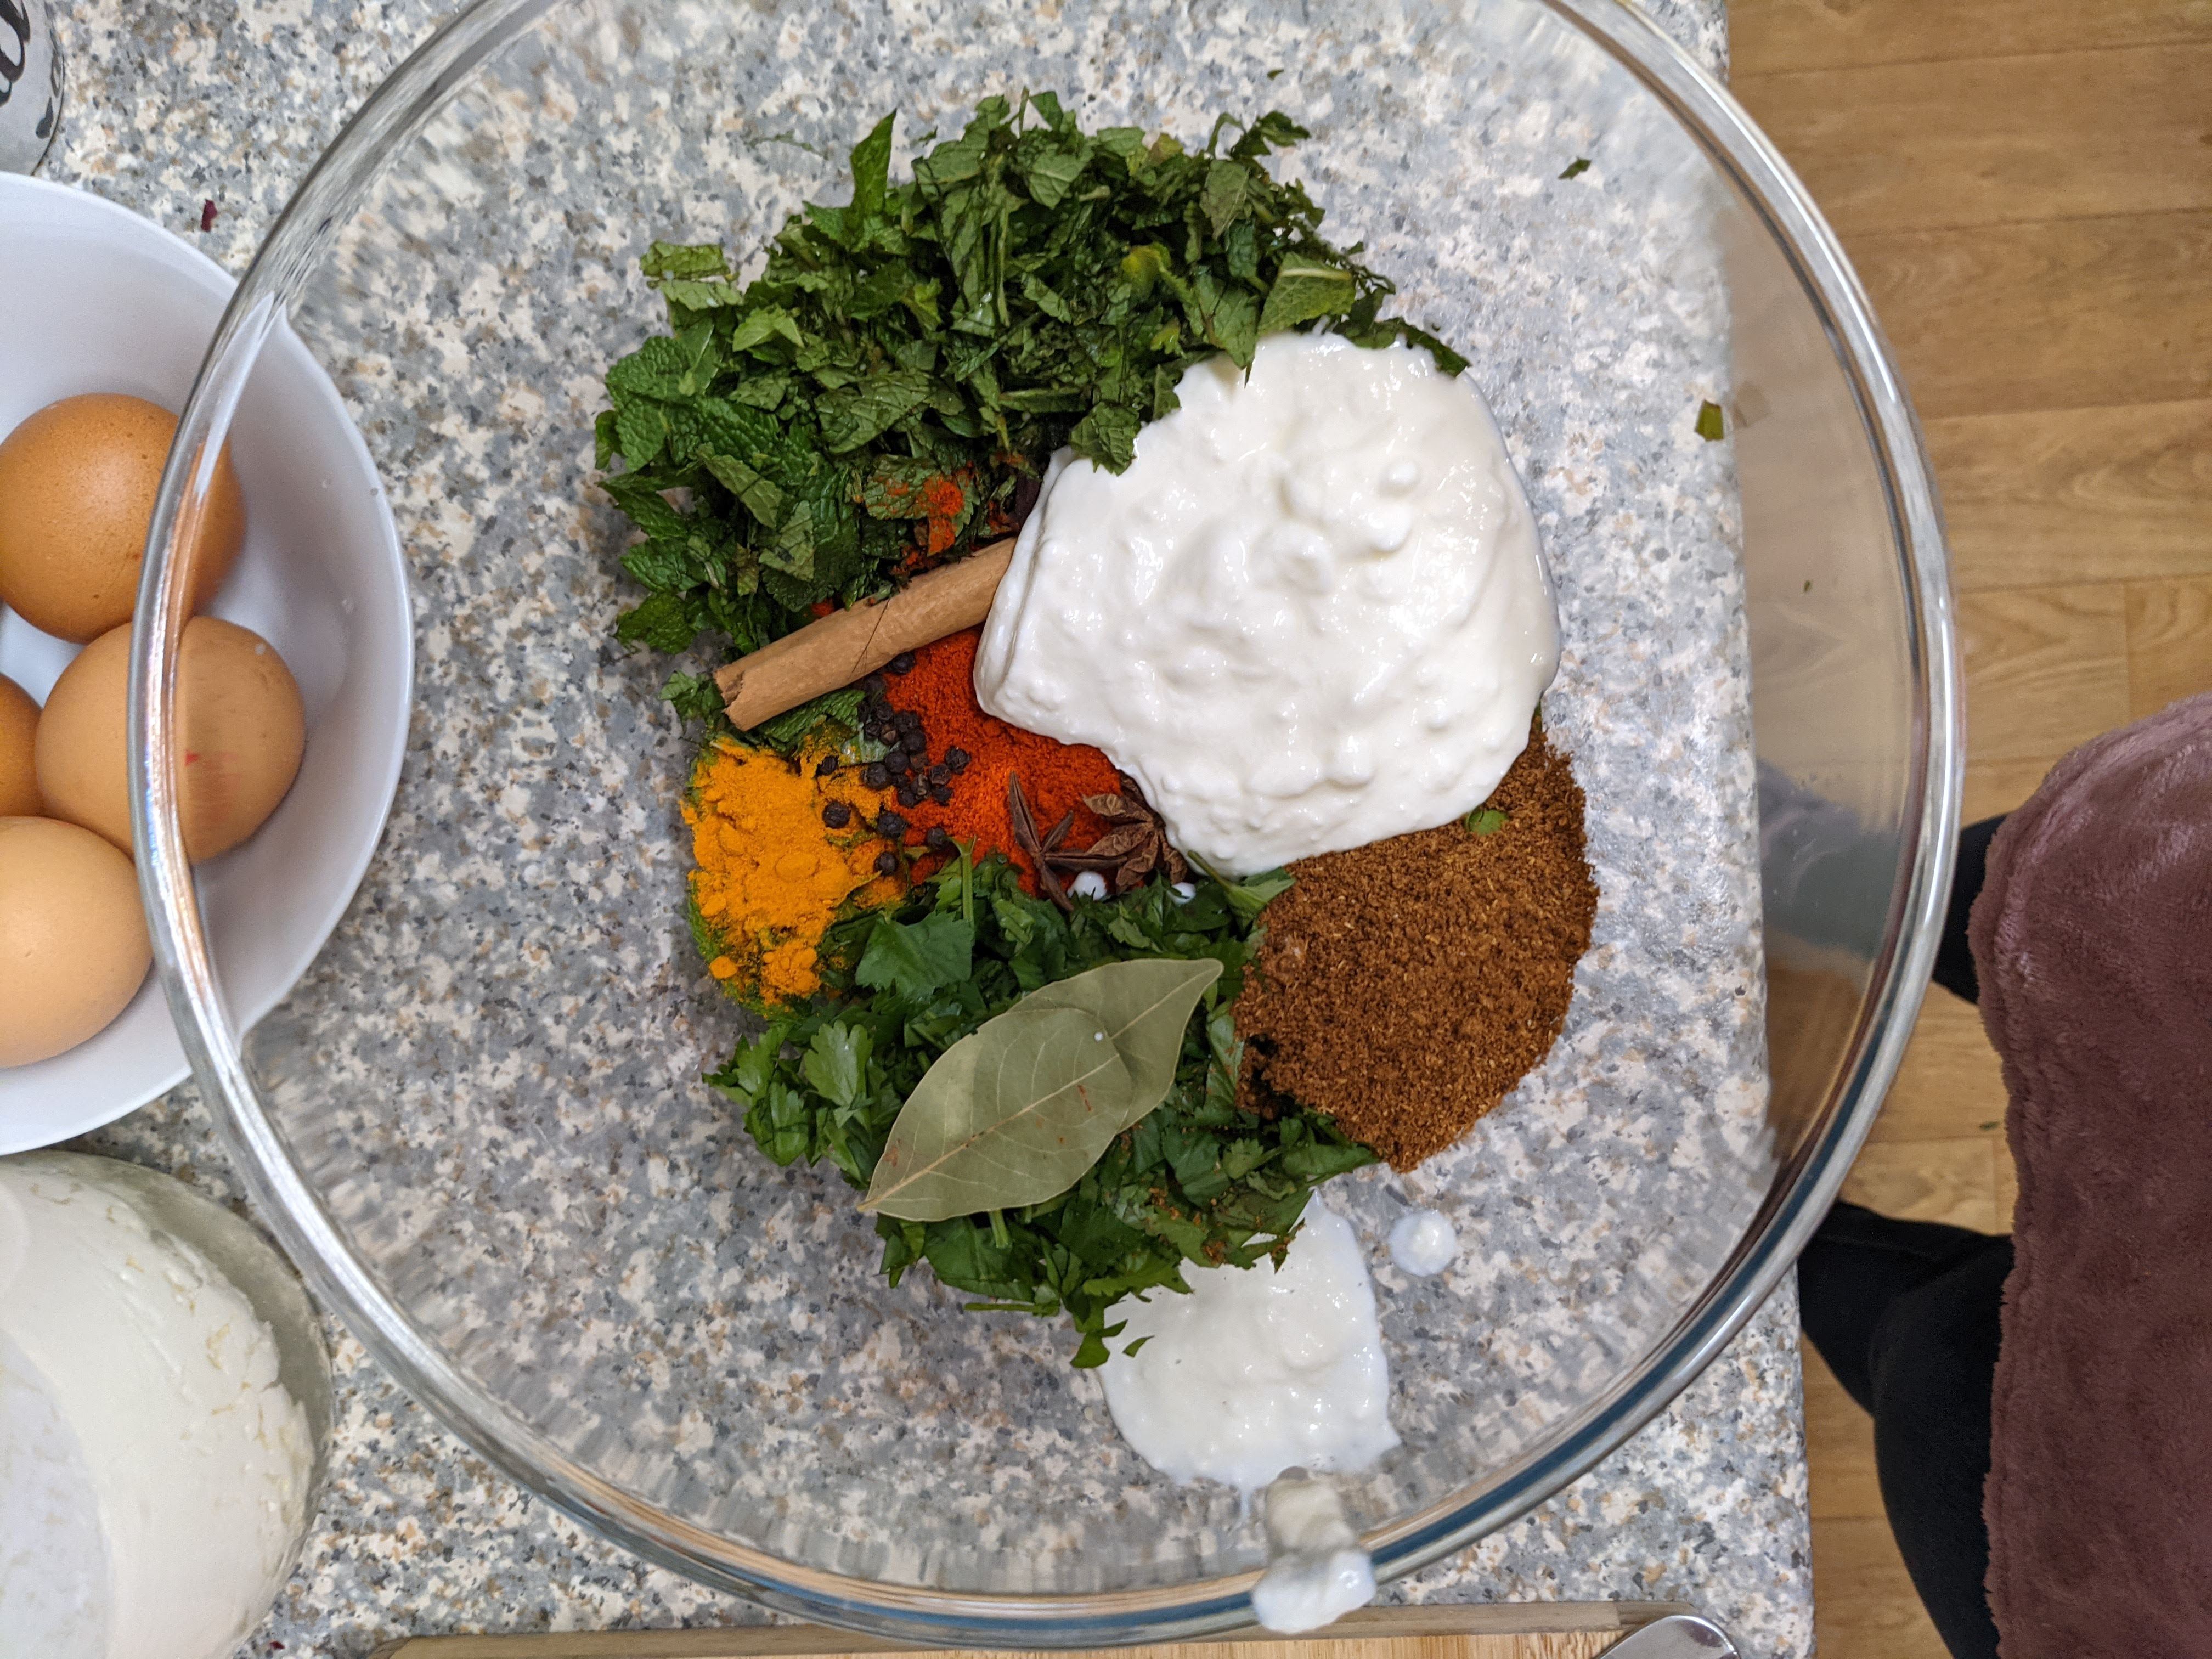
Add the chicken to the bowl and stir. The way to get the best marinade is by actually using your hands to stir the chicken around in the sauce. Please wear gloves if your hands are sensitive because of the chili powder! Set a timer on your phone and stir the chicken in the sauce for 5 minutes. Be sure to rub the sauce on every piece of chicken. The sauce should not cover the chicken, but should be rubbed on all surfaces of the chicken. Cover the bowl and refrigerate for 24 hours. (You can marinade it for less time if you are in a pinch, even an hour’s marinade will help with the flavor).

3. Saute in Instant Pot
After 24 hours, heat the coconut oil in the Instant Pot on “Saute” mode. Add the chicken once the oil is hot. Dump the whole bowl out into the Instant Pot, spices and all. Keep it on “Saute” mode for 5 minutes, stirring the chicken around so that it will not burn.

4. Soak the Rice
While the chicken is sautéing in the pot, pour three cups of rice into another bowl and rinse thoroughly. It usually takes 4 rinses for the rice to be ready. You just want the water to no longer be cloudy when poured off of the rice.
After the rice is rinsed, fill the bowl with water to just cover the rice, no extra. Set aside and let soak for 30 minutes (I highly recommend setting a timer for this as you do not want the rice to soak longer than 30 minutes).
5. Cook the Chicken in Instant Pot
Now that the chicken is done sautéing, add 1 cup of water to the chicken. Cover and cook on high pressure for 10 minutes with the vent open. Quickly release the pressure when done by pushing the vent open.
6. Cook the Biryani in the Instant Pot
After the rice has soaked for 30 minutes, spread it over the top of the chicken evenly. Add 1.5 cups of water to the Instant Pot. The water should be almost covering everything, but not quite.

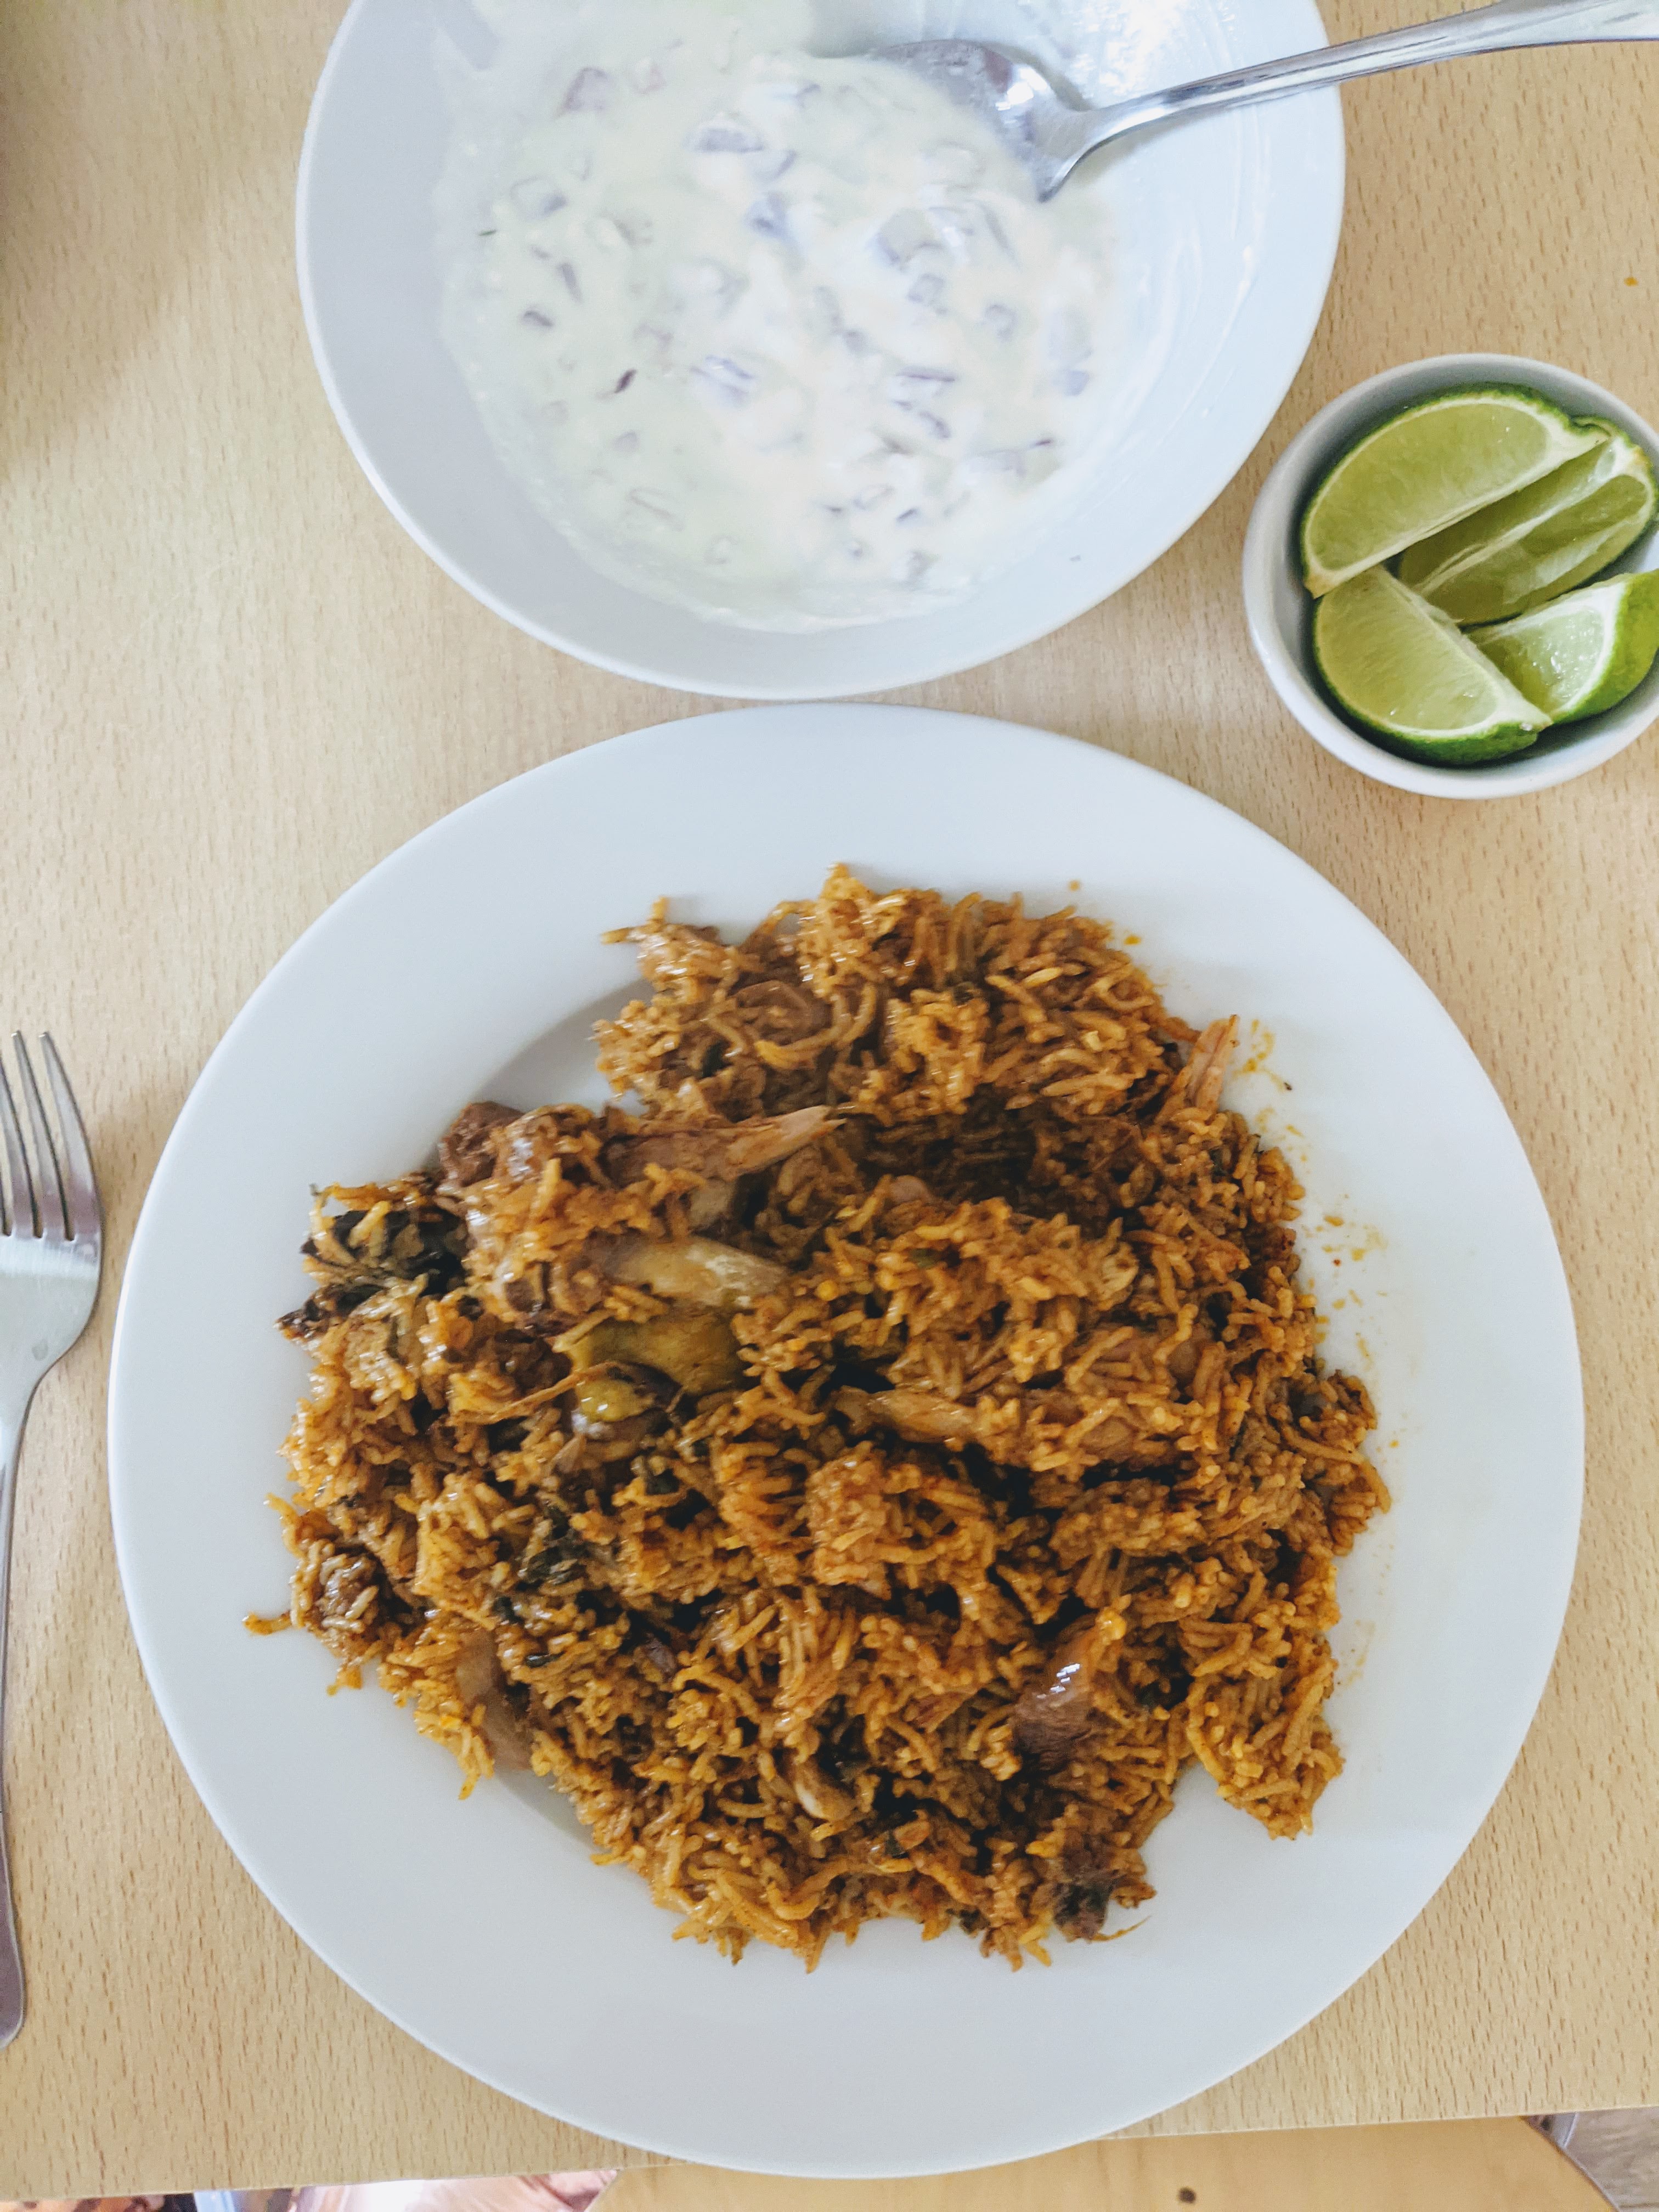
Place the lid on top and cook on high pressure for 6 minutes with the vent closed. After the 6 minutes, let the pressure release naturally without touching the vent for 10 minutes. Then turn the vent to let the rest of the pressure out. Spoon out the biryani and serve with plain yogurt or raita and boiled eggs.

Real Quick Raita
Traditionally, you would serve raita along with biryani. The easiest way to make raita is to add chopped onion and cucumber to plain yogurt and stir. If the yogurt is very thick, add some water so that it is thin enough to spoon onto the biryani.

Enjoy with Friends!
This dish makes an excellent main course along with fresh fruit or veggies. It makes quite a bit of food, so it’s the perfect dish to share with friends. If you, or your friends, do not particularly care for spicy food, simply omit the green chillies and/or the chili powder.
Let me know if you give this recipe a try in the comments below!
More Recipes:
DIY Yogurt in the Instant Pot
Potato Fry Curry
Masala Roasted Chicken